Our team created Backrooms: Descent, a first-person survival horror and exploration game set in the unsettling, liminal world of the Backrooms. Players were tasked with escaping a series of uniquely designed levels, each with its own threats, layouts, and escape mechanics, while being hunted by a variety of unpredictable entities. Each entity featured distinct AI behaviors—some moved quickly through vents like spider-like creatures, while others, more humanoid in nature, stalked players using deceptive audio cues. We began by crafting levels manually to ensure depth and balance, while also exploring the potential for procedural generation to reflect the infinite and chaotic nature of the Backrooms lore. To increase replayability, entity spawns were randomized, making each run feel fresh and unpredictable. Immersion was a core focus, achieved through the use of claustrophobic spaces, dynamic lighting, and haunting soundscapes that heightened tension and delivered a truly chilling experience.
Team Members :
Daniel Peskov, Jonah, Charlie, Mustafa and Ryan
Nguithr'xurh Entity Creation
Blueprinting Widgets , systems and movements.


Modelling in Audesk Maya


For this model i wanted the legs to more boney and have much more length to them. This also helps alot with the joints as im able to add more the one joint to the rig. Using the extrude tool helped me to do this.

In this slide , what i noticed on many spiders is that they would have these phere like fangs on their faces. I have no idea what they're used for. However to add realism to my spider I decided to add them.
How I created these was simple , using the sphere geometry I scaled it upwards to look like a bean. Then selected the top half faces and rotating slightly backwards I was left with what you can see in the top left.
From then i simply duplicated the beans and placed them in the mouth of the spider.

After completing the body and the head. Now it was time to add the spider legs.
Following the reference image a few slides back of the banana spider. What I did first was duplicate 4 legs onto the left side of the spider , then using the mirror tool I was able to just copy it over onto the right side. Thus leaving me with this beauty.

Rigging and Wireframe

The way this speeded things up was to create the spine joint first , lining them up with each of the legs. This was a great thing to learn as it gives me more of an understanding in how the joints can work like shoulders.
From there, we moved up to the head and fangs area placing the joints in the correctly allocated areas of the upper body. With this all connected and working it was time to rename all the joints. In the previous slide I showed an image that helped me to understand how to effectively name joints.
Next was to create the legs, this part was the easiest as we created one leg and used the duplication tool to speed things up was quicker. Once all legs were duplicated and all lined up I used the tool ‘connect joint’ to the spine.
In this slide I have showed a screenshot of the head joint animation. For this instance I wanted the spider to look real, and by doing that I turned the head joint to either side 2 times.
I did this two times because I wanted it to flow in a loop just like the body breathing. I also added a slight rotation to the neck as well. This makes the spider look curious as well as neutral. The graph below shows the movement of the head. In the next slide you will see the animation.

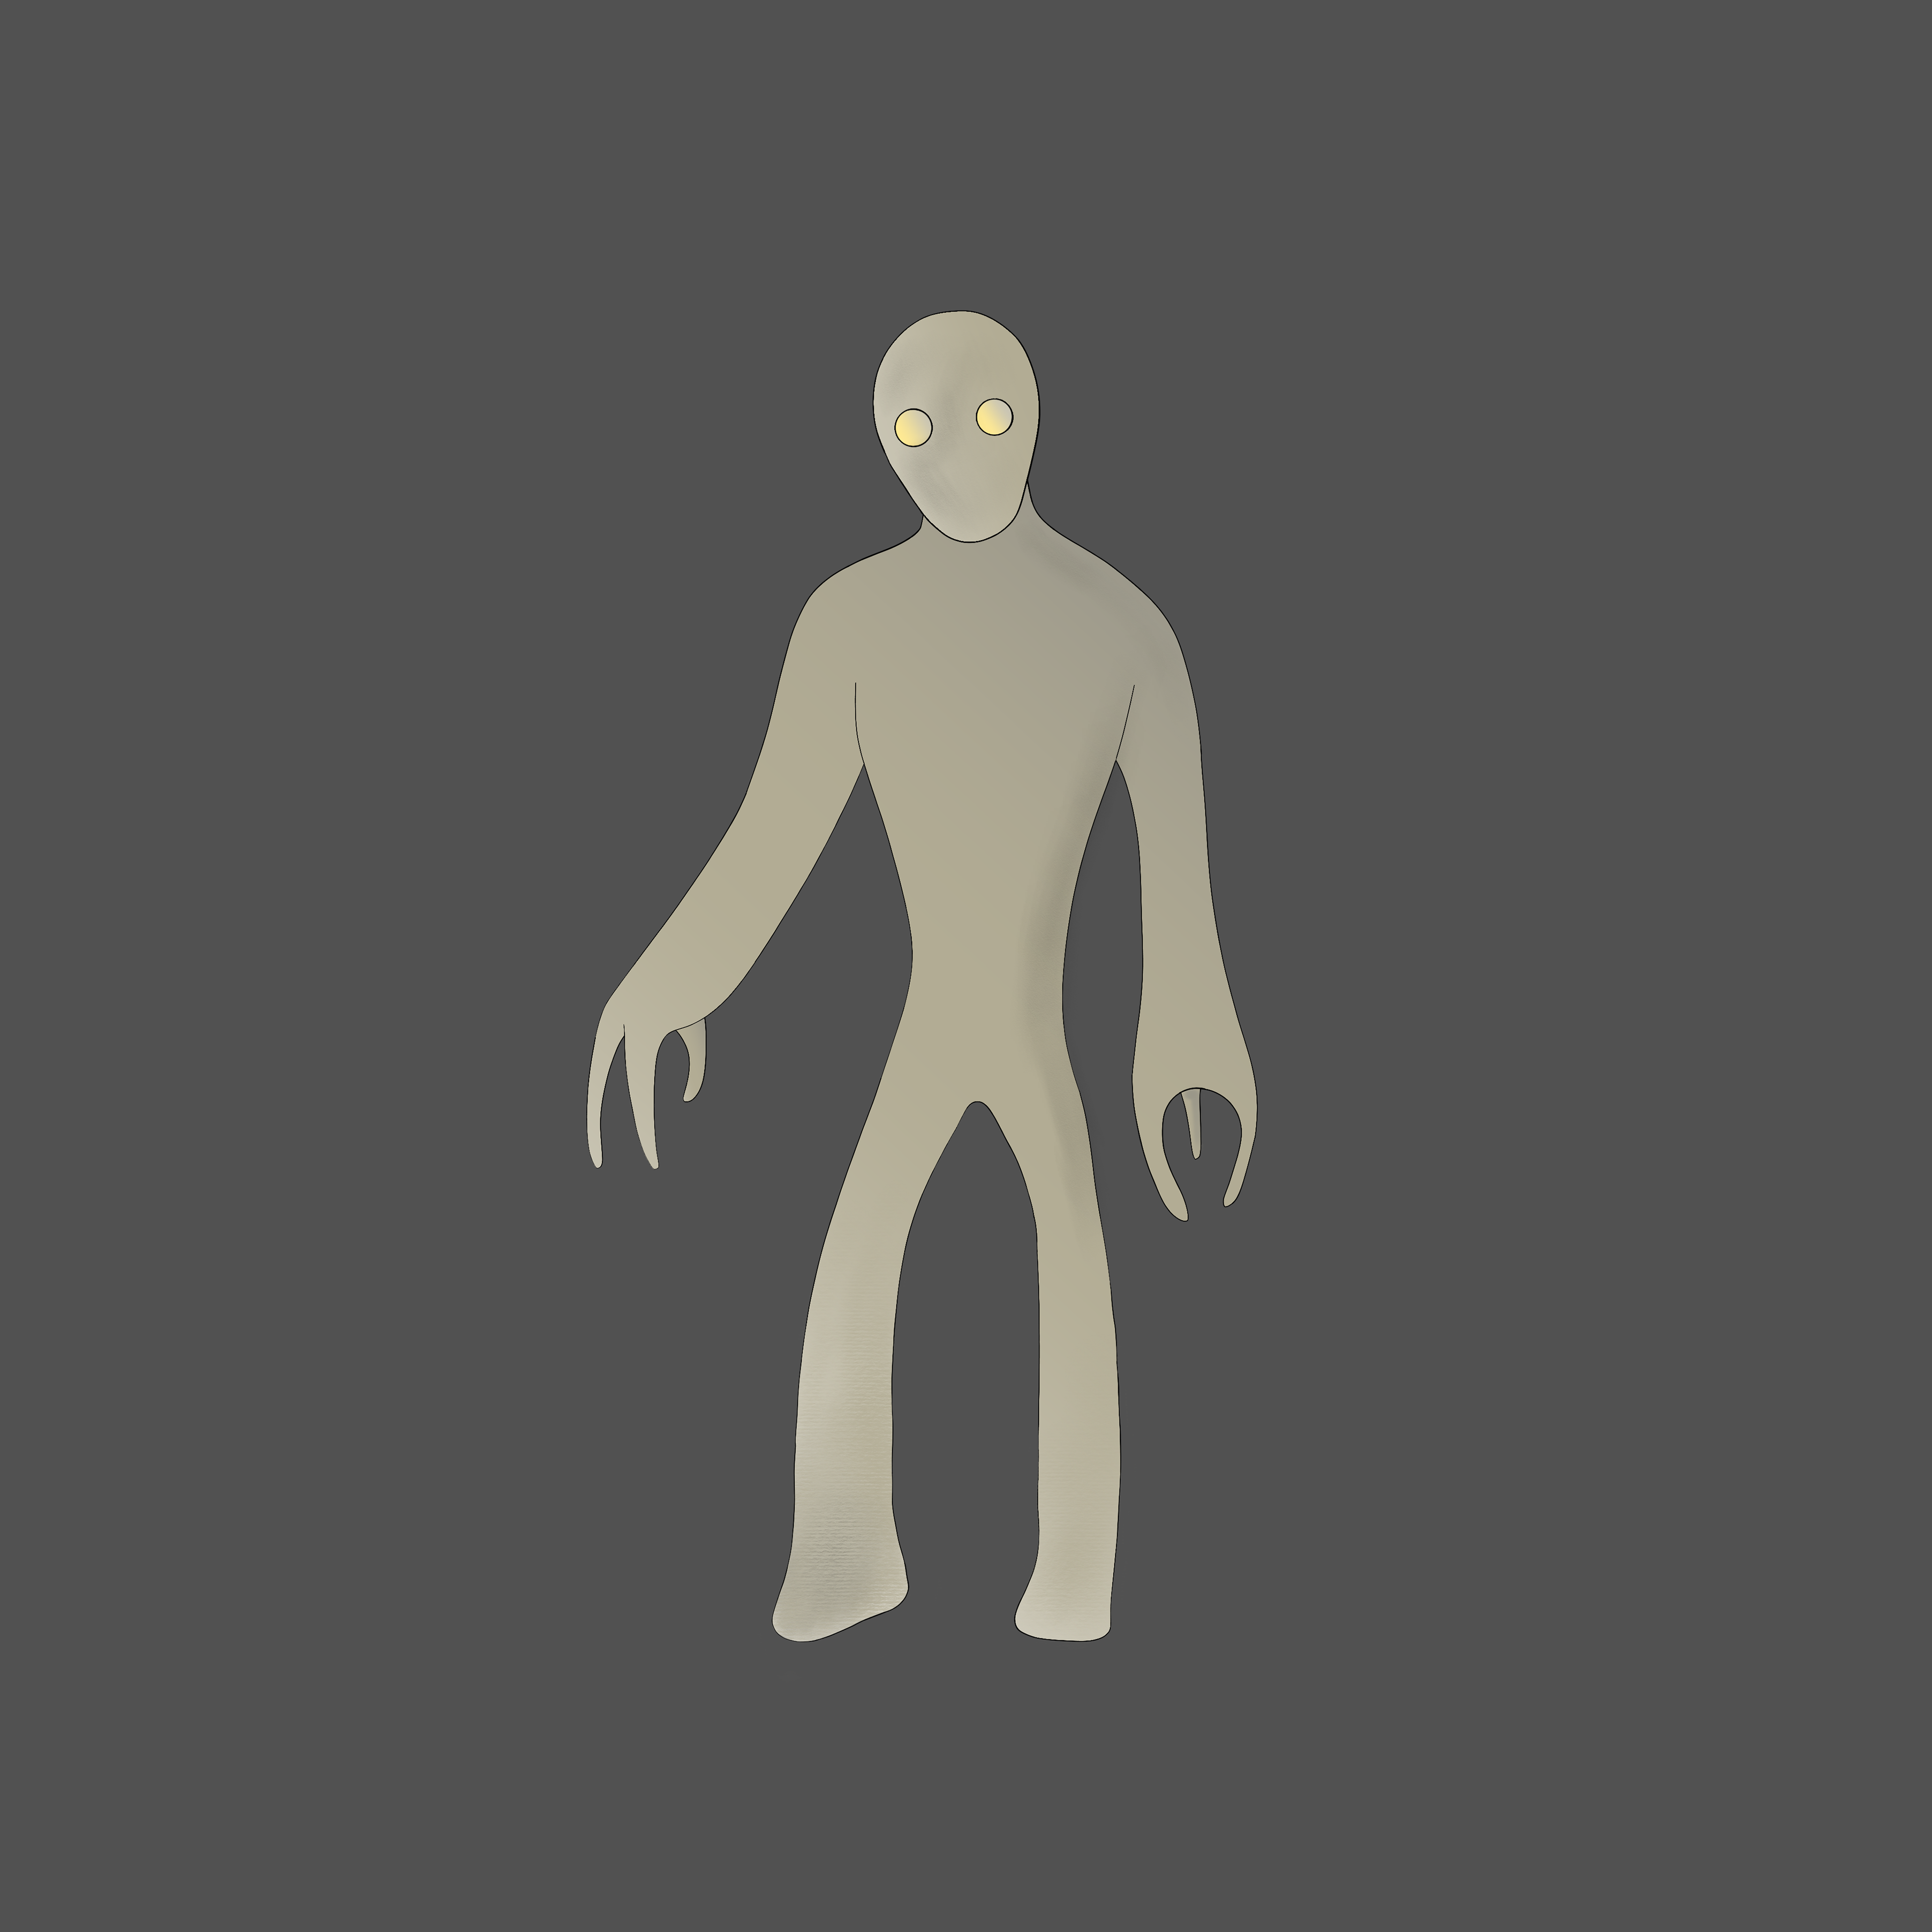
Skin Stealer Entity Creation
Concept Art given to me by the concept artist Jonah
After I had created one half og the model I used the mirror tool to copy the other side of the limbs to the body. Simply using the target weld tool and bridge tool I was able to join up the limbs to the body and create one smooth skin suit.
After the model was connected with the different tools I had then used the mesh - smooth tool, to create this skin suit you can see on the left. This comes to around 30,000 Polygons with the use of x1 subdivisions on the smooth tool.
After some tweaks with the hypershade the right model I with some lambert pale green, similar to the real skin stealer from the back rooms lore.


Here is the eyes after the texturing of the skin and eyes. Very simple nothing fancy about the skin stealer model with textures. You can see that the smoothing tool also made it look much better.
Moving on, In this slide Is where I connected the hands to the forearm of the model. By deleting the top faces of the forearm and the top faces of the hand I was able to use the target weld tool to connect the hand to the arm. This was very simple but the only issue I had was the target weld tool would not work at first.
The way i fixed this way by having to combine the two separate models together and then use the target weld tool. Overall I think this looks great and in the next image you can see the final.
Here are the boney looking fingers of the skin stealer, this ultimately looks great on the model in my opinion and really adds to that horror effect that we are looking for.
However in this slide, you can see that this model is much more smoothed out.

Rigging and Animating in Autodesk Maya

On the left you can see the different listed joints which are all over the model. As well you can see white highlighted area around the selected joint. This area is the weight of the joint. With this tool I was able to specifically edit and change the joint weight of the skin to best as I could. I do this on every joint with the paint brush. With the options underneath i can use the replace paint operation to add any weighting to the model where I want. And with the smooth paint operation I can smooth down the weighting so it's not as sharp and aggressive with the joints.
As you may also see the value underneath set at 1.0000. If i set this to 0.000 I can remove any weighting i want on the model for the joint selected. For instance , some parts of the model had weighting in areas that were not relevant. In order to fix this I used the this tool.
Here is a side by side of the models before smoothing and rigging and after. Here you see the huge difference between the two and how much of an effect the smoothing does to the model.
Moving on from this, the next step will be create the animations for this model. Here is the list of animations I will be creating for this model :
Idle Animation - Will be for when the entity is stood Still.
Walk Animation - Skin stealer will be walking around The level docile waiting for the player.
Running Animation - For when the player is being Chased by the Skin stealer.

Overall, I'm pleased with how the project turned out. Our team's initial goal was to develop a horror-themed game with five unique levels, each with a distinctive goal and theme for the player to explore and navigate. We also intended to provide a variety of things to improve the user experience and gaming. Even though we had to shrink the project back to only one level at the end, we were still able to produce a respectable horror game that would appeal to The Back Rooms fans. This project has made it clear how important it is to set reasonable targets within the allotted time frame and that quality will always prevail.
Strengths of the game:
The map's design really captures the eerie feeling we were going for. To do this, we added ambient lighting, which made the gameplay appear darker and more sinister. The level, in our opinion, successfully reflects The Backrooms, the game's inspiration, therefore it is true to style. Given the brief time we had to complete them, these things turned out very well.
The spider model is particularly effective since we took into account comments about how simple and low-quality quality the original design appeared, and we then used more reference material to recreate the model as accurately as we could. The crew understood that this was a turning point that quality had to take priority over quantity.
The game's simplicity—it only has one level—makes it suitable to gamers who may only have a short amount of time to play or to speed runners who like a straightforward challenge in their gaming.
Potential improvements to the game:
Utilise the streamlined inventory system we only came up with at the very end of the project to incorporate additional items into the gameplay. If we had addressed this issue sooner, I believe we could have introduced a lot more objects to the game, greatly enhancing the gameplay
Increase the number of game levels. The fact that we only created one level for the game was disheartening. Multiple levels would have increased playability and enhanced the player's immersion. Consequently, a more pleasurable and perhaps more lucrative game would have resulted;
Integrate more varied entities into the game such as hounds and death moths, which would amplify game play and make it more engaging for the player;
Get the Game here.